
How to Light an Interview with Portable LED Lights
Key Takeaways
- Interview lighting setups on traveling shoots often rely on a single, large, soft light source for a natural, flattering look.
- Soft, foldable LED mats and battery-powered panels offer professional results for indie filmmakers, and they can easily fit in a taxi.
- Learn to balance your exposure for any sensor, from entry-level cameras to high-end cinema cameras like the ARRI Alexa 35.
- Your lighting should complement your framing. We’ll show you practical examples for solo, two-person, group, and outdoor setups.

Picture this: You’ve booked a last-minute sit-down in a small office, the client wants a cinematic vibe, and all you can carry in a small vehicle are two light stands and a few bags. A smart interview lighting setup—built around soft LED mats, quick-swap diffusers, and sometimes even battery power—lets indie filmmakers, content creators, and boutique agencies nail professional results whether they’re shooting on a DSLR, Alexa Mini, or RED Komodo.
Below, you’ll find practical tips for using LED lights for interviews, framing tricks, and cost-savvy gear picks to turn any office corner or living-room set into a studio-quality backdrop.
Why Lighting Makes or Breaks an Interview
A great interview lighting setup does two things at once: it convinces viewers the scene is “naturally” well-lit enough that the subject looks great, and quietly guides their eyes to the story you want them to watch. Soft LED mats with the right size of diffuser spread light so evenly that pores disappear, while a smaller light can be more punchy and might bring in cinematic contrast. Add an egg crate (grid for the light), tilt a C-stand arm twenty degrees, and you’ve changed the mood from corporate-clean to documentary-cinematic—all without moving the camera.
When you’re choosing LED lights for interviews, always think in terms of creative goals:
- Shape & depth: A big diffuser (24″+) turns a hard light into a broad, gentle key that flatters every skin tone. Or, use a FalconEyes flex mat style light to begin with – as long as it’s about 2ft in size, you’ll get a soft light quality.
- Real-world practicality: Battery-friendly LEDs keep cords off the floor—gold for tight offices or outdoor walk-and-talks.
- Scene types: A simple one-person sit-down may need only key + fill, whereas a two-person chat or outdoor profile often needs multiple key lights, or benefits from an extra rim or bounce to separate subjects from busy backgrounds.
- Invisible craft: “Make it look like it’s not lit.” Aim your key as if it were window light, use fill only to lift shadows, and let a subtle hair light hint at depth if you have the extra lights.
The Gear That Gets the Shot (A Behind-the-Scenes Look)
Before diving into techniques, let’s look at a typical mobile setup. The goal is to be efficient and adaptable. Modern LED technology means you no longer need heavy, hot, power-hungry lights to get a beautiful image.
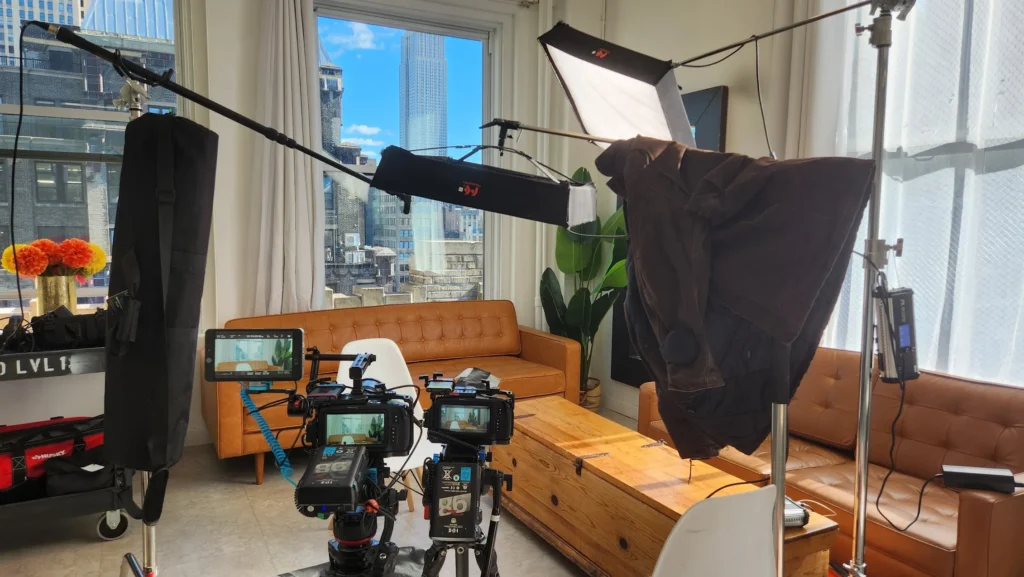
This setup includes multiple cameras for different angles, a boom mic for clean audio, and two versatile LED light panels on C-stands. Notice the large windows providing natural light, which the artificial lights augment, and a soft top light adds extra shape to the subject’s face. This is the kind of flexible, high-quality setup you can build with portable gear.
Grab our Top-Tier 4K Documentary/Interview Package!
Core Interview Lighting Techniques
While film school teaches the classic three-point system (Key, Fill, Backlight), real-world shoots, especially with budget or travel constraints, often require faster, more flexible solutions.
The Single-Source Solution
One large, soft light source is often all you need. It can actually put out the most natural and flattering light.
- How it Works: Place one large LED panel with a generous diffuser (like the 2ftx6ft pop-up diffuser we carry) about 45 degrees from the subject, positioned just above their eyeline. This single source acts as both the key and somewhat as a fill, creating a soft, wraparound light that minimizes harsh shadows and looks incredibly natural, like light from a large window.
- Why it Works for Pros: It’s fast, requires minimal gear, and is perfect for run-and-gun interviews where you’re moving between locations. You get a clean, professional look without a complicated setup.
Advanced Interview Lighting Techniques
The Book Lighting Technique
For an even softer, more premium look, try “book lighting.”
- How it Works: Instead of pointing your light at the subject, you point a powerful light source at a large white surface (like a bounce card or foam core), and that reflected light becomes your key light. The bounce acts as the “page” of the book, and the direct light is the “cover.”
- The Result: This creates an exceptionally soft, often a no-shadow light that is perfect for high-end corporate interviews or beauty shots.
A Powerful but Flexible Lighting Setup
Below is the practical “recipe” you can drop into any office corner, apartment, or co-working booth. It’s built around portable LED lights for interviews and a mix-and-match diffuser lineup, so you can chase whatever look the project (and budget) demands.
| Light | Position & Height | Diffuser / Modifier | Typical Power | Quick Purpose Cue |
| Key – 150W Flex Mat (e.g., FalconEyes) | 45° camera-left, just above eye-line, angled down | 36-in softbox (swap to 24-in for more contrast) | 40% (Alexa) → 70% (DSLR/Komodo) | This is the workhorse. Shapes the face and sets the primary mood. |
| Fill – Second 150W Flex Mat (e.g., FalconEyes) | Opposite the key light, as a direct soft source or bounced. | 36-in softbox or bounced into a white card. | 20–40% | Provides a consistent, high-quality fill. Can also be used for a two-person interview or a “book light” setup. |
| Backlight / Rim – Intellytech Light Cloth RGBWW | High, behind the subject, aimed at the crown/shoulders. | Native soft frame or gridded for control. | 30–50% | Far more powerful and versatile. Separates the subject from the background. Can also be used as a background color wash. |
In a nutshell
Single-source is fast and flexible, ideal for run-and-gun shoots. Book lighting delivers exceptional softness for premium visuals. For versatile control, the Flexible setup provides a comprehensive solution adaptable to various environments and artistic demands.
What is the best lighting gear for making YouTube videos?
When we talk about setups for streamers or YouTubers, a single-point source often does the trick, especially in tight real-world spaces. We always stress that one big, soft light works wonders if you can only fit in one light and stand. All our lighting gear leans toward LEDs since they’re soft, lightweight, and simple to carry around.

Interview Framing & Lighting Ideas - BTS Insights
Here are four common scenarios, with lighting setups and framing ideas you can copy directly for your next shoot.
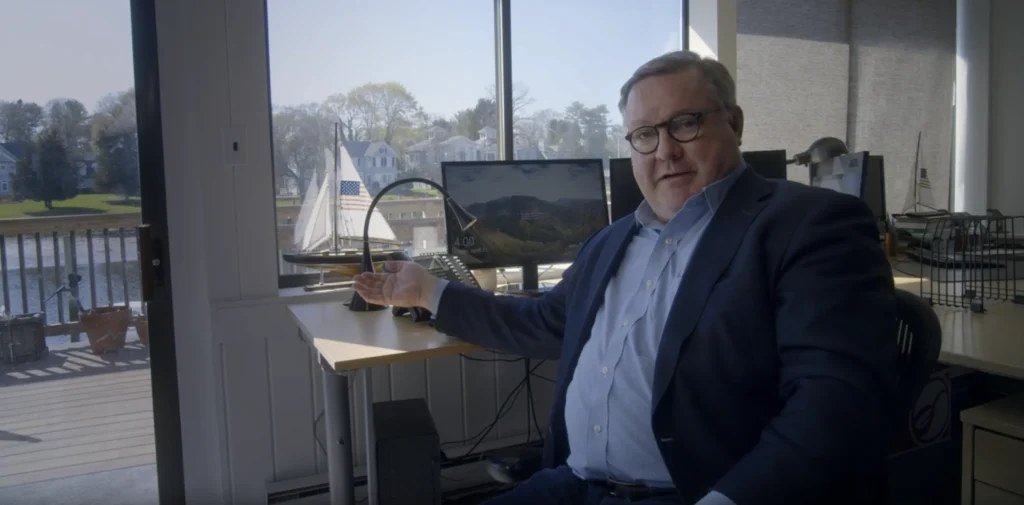
1. The Solo Storyteller
This is your classic single-person interview, perfect for documentaries or corporate testimonials.
- Frame: Medium-close shot; subject is slightly off-center, looking across the frame.
- Lighting: This look is achieved with a large, soft key light (like a 150W flex mat with a 36″ softbox) camera-left. A bounce card on the opposite side provides a touch of fill to soften shadows on the right side of the face. The window provides natural depth to the background.
2. The Two-Person Chat
For interviews with two subjects, the goal is to light both individuals flatteringly without spilling light everywhere.
- Frame: A wider shot that captures the interaction between the subjects. Position them in a gentle ‘V’ so they can comfortably look at each other and the interviewer.
- Lighting: A common approach is to use two key lights, one for each person. Alternatively, one very large, soft light source placed centrally can cover both subjects. Here, a soft overhead light provides even illumination across all participants.
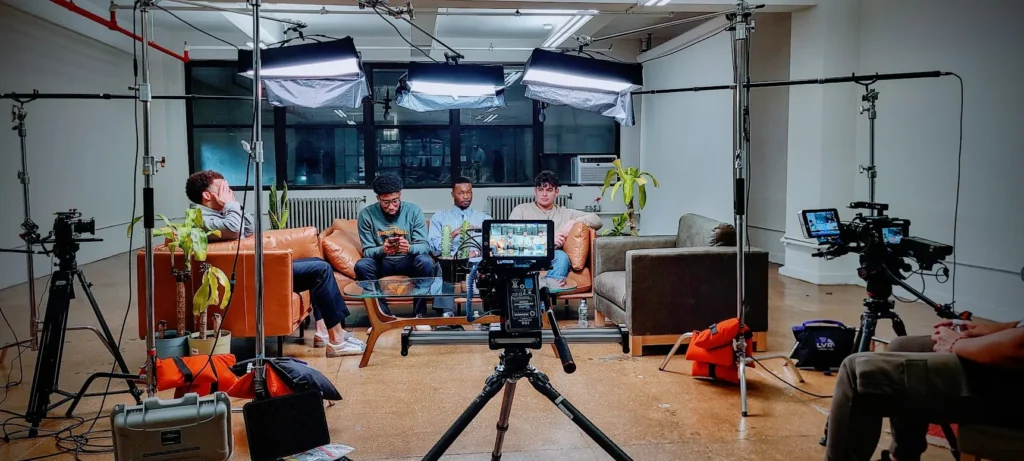
3. The Multi-Person Roundtable
Group discussions require a broader lighting approach to ensure everyone is visible and well-lit.
- Frame: A wide master shot is crucial to establish the group dynamic. Use additional cameras for tighter single shots of each speaker.
- Lighting: This setup uses several large, soft overhead light sources to create a base level of illumination for the entire group. This ensures that as people move and interact, they remain in the light. The key is to make the lighting feel natural to the room.
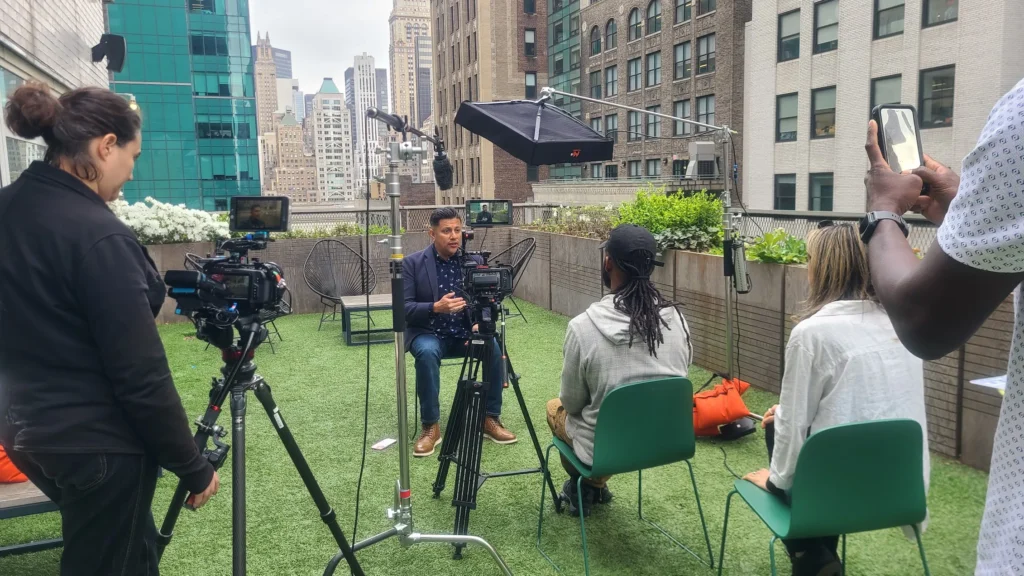
4. The Outdoor Stand-Up
Taking an interview outside introduces a powerful and unpredictable key light: the sun.
- Frame: Use the environment to your advantage. A city skyline or park can provide a dynamic, authentic background.
- Lighting: Position your subject so the sun is behind them, acting as a natural hair or rim light. This separates them from the background. Then, use a powerful, battery-operated LED (like a FalconEyes Flex Mat) set to daylight (5600K) as your key light to properly expose their face. This balances the bright background and creates a polished look.
Our Grab-and-Go Rental Gear List
Ready to turn your interview into a polished visual? Our grab-and-go gear list features top-tier LED lighting and accessories, all designed for fast setups and cinematic results—no grip truck required.
| Item | What it does | Day rate* | Why you want it |
| 150 W FalconEyes Flex Mat + 36” softbox | Big, wrap-around key light that folds flat | $45 | Soft, flattering key in any office corner |
| 2 × 150 W FalconEyes Flex Mat kit | Same mats, extra punch or instant fill | $80 | Split for key + fill or stack for bright corporate looks |
| Viltrox L-series Panel | Pocket-size LED panel (NP-F battery) | $12 | Feather-light fill, rim, or webcam key |
| LiteCloth RGBWW 2 × 2 Panel | Foldable color wash / background light | $61 | Add teal, brand colors, or neutral white backdrop wash |
| Aputure Accent B7c Bulb (3-pack) | Practical lamp that doubles as hair light | $21 | Screw into any household socket, app-controlled warmth |
| RGB Wand Lights (pair) | Battery tubes for in-frame streaks | $13 | Quick color accents, car interiors, TikTok vibes |
| 1500 W Inline Dimmer | Old-school triac for tungsten units | $15 | Finesse practical lamps; no extra console |
| FalconEyes RC-3T Remote | 2.4 GHz wireless for the flex mats | $10 | Dim or color-shift from behind the lens |
Access our complete Lighting & Electric Inventory here.

Achieving a Cinematic Interview Lighting Look
“Cinematic” often means adding mood and depth through contrast and color. It’s about shaping the light intentionally.
- Use Harder Light: Swap a large softbox for a smaller one, or use a grid to control spill. This creates more defined shadows and a moodier feel. A diffuser is critical here; a smaller diffuser creates higher contrast.
- Negative Fill: Instead of adding fill light, use a black flag or the dark side of a bounce card to absorb light and deepen the shadows on one side of the face.
- Introduce Color: Use RGB-capable LED lights to add a subtle color wash to the background. A cool blue or warm orange can completely change the emotional tone of the scene.
- Practical Lights: Incorporate lamps or other light sources that are part of the scene into your lighting scheme. This adds realism and depth.
Camera-Specific Tweaks
Even the best interview lighting setup needs micro-adjustments for the camera you’re using.
| Camera Body | Sweet-Spot ISO | What to Change on the Lights | Quick Win |
| ARRI Alexa Mini | EI 800 (clean up to 3200) | Dim the key to 35-40%; use the largest diffuser you have for extra wrap. | Lift the fill instead of the key—Alexa’s highlights stay gorgeous when you shoot a touch under. |
| RED Komodo 6K | ISO 800 (pushes fine to 1600) | Run the key at 60-70% or add a second flex mat; keep the diffuser on to avoid shiny skin. | “ETTR: expose skin ½ stop bright, then pull down in post—noise drops fast.” |
| Modern Mirrorless/DSLR | ISO 400–1600 (varies) | Start at 50% on the key; bump or cut in 5% steps while watching your exposure tools (zebras/waveform). | If highlights are clipping, swap the 36” softbox for a 24”—it buys you contrast without moving stands. |
Pro Tip: Set your camera’s ISO and shutter speed first, then build your lighting to match the sensor. It’s the fastest path to a balanced, noise-free image.
Quick Fixes for Common Interview Lighting Problems

How to light an interview with LED lights?
Start with a single, large, soft key light. Add a bounce card for fill and a small backlight if needed.
How do I avoid glare on glasses during an interview shoot?
Raise the key light a few inches and tilt it down. If glare persists, slide the light 10° further to the side—the reflection will move out of the camera's view.
How do I mix window daylight with LED lights?
Set your LED lights to 5600K (daylight balanced). Use the window as your key or rim light, and use your LEDs to fill in shadows.
How do I prevent LED flicker at high frame rates?
All the rental LEDs here are flicker-free. However, if you see banding when shooting slow-motion, dim the light by 5% or tweak your shutter speed slightly.
What size diffuser should I use for a cinematic look?
Use a large 36" softbox for a soft, commercial vibe. Swap to a 24" or a grid for moodier, contrast-rich shadows.
The Secret to Studio-Quality Footage Anywhere
A tight, portable interview lighting setup—built around soft LED mats, battery-powered panels, and an optional RGB wash—lets you walk into any office, living room, or co-working space and leave with footage that looks like it came from a full studio day.
Ready to light your next shoot? Book your interview lighting setup now!